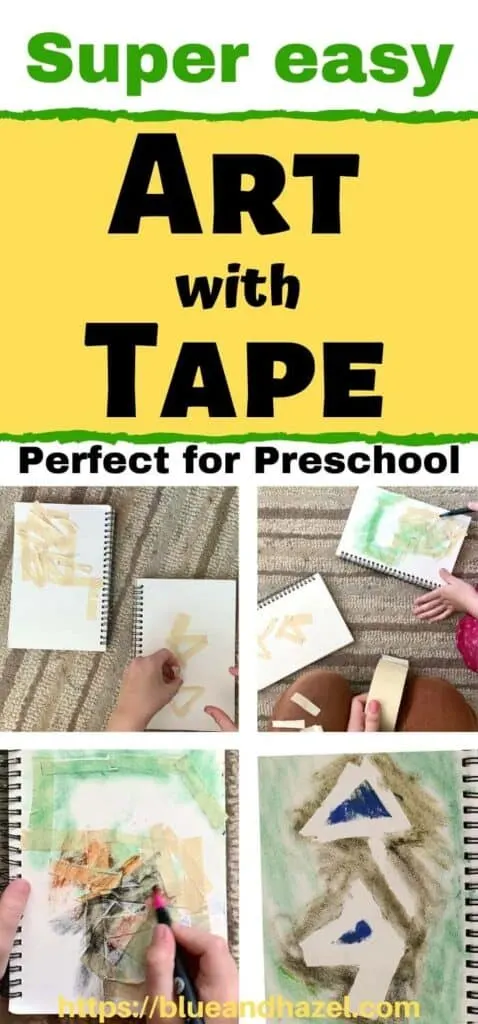
This fall, our homeschool co-op hired an art teacher who introduced us to tape resist art. It was such an easy and mess free project that we went home and made more that week in our kindergarten homeschool! Tape resist art is entertaining for preschoolers to adults, and can be done on paper or canvas! You can use paint, watercolor, markers, or crayons.
It’s seriously so fun and you can let the kids put the tape on however they like! Just peel off the tape at the end, and reveal those crisp straight lines. Best thing, you probably already have the supplies. Have I convinced you to try it out?!

Supplies needed for this tape resist art technique
- Tape: masking tape, painters tape, or washi tape
- Color of some type: Watercolor markers, watercolor paint, crayons, or paint
- Paper or canvas
We used these smaller 100 page blank journals for our tape resist art project. The pages are thick and don’t easily rip. Marker and watercolors will not soak through the pages which is nice for this type of project. I also love having a bound book for art as it’s so fun for me (and the kids) to look back on!
But truly, you could use any tape + the inside of a cereal box and some markers. Just roll with whatever supplies you already have, and then do it again with something fancier later!
How much prep and clean up time?
I only mention this because it’s often times the limiting factor for me. I’m a low energy mama with three enthusiastic kids 6 and under that need generally need help here and there for art projects.
Prep is easy! You’ll just be tearing off chunks of tape of any length you like. That’s all.
Clean up is just as easy. Gather those same pieces of tape (once they are peeled off) and toss in the garbage. Done.
What’s the best tape to use for resist art?
Painters tape is the best, as it’s the least sticky and easy to pick up and reposition.
Masking tape (what I used) is good too but slightly more sticky. It works well unless you are using something thin like printer paper then it may have a hard time coming off without tearing.
How to make this easy tape resist art project with your preschooler
Step 1: Cut up pieces of tape ahead of time
Having a bunch of pieces cut ahead of time will keep your kids from getting bored and wiggly. Especially if you have multiple kids. They could also help cut off pieces!
If you have super wide masking tape like I did, just cut each strip in half.
Step 2: Arrange the tape on the paper

I let my kids put it wherever they wanted. It’s fun to see what their creative brains are thinking. If you want some ideas or to make a more advanced art piece, you could:
- Write out their name with tape
- Make designs with tape
- Tape a capital letter or lowercase for whatever letter they might be learning
Step 3: Color over the tape

Encourage them to color the whole paper with crayons, tempura paint, watercolors, or markers! If your kids don’t seem to want to fill in every bit of space, help them to at least color any areas that touch tape. Otherwise it won’t show a line when the tape comes off.
We have these watercolor pens. I’ve tried a couple sets and they are really fun to learn how to use. But you don’t need fancy pens to do this project.

Step 4: Slowly peel off the tape
Your kids should be able to do this on their own. Talk about what they see. How does it change the picture? Do they like their new design? You can see how these turned out. The kids loved them, and it was a solid 20 minute activity.


Another fun preschool activity playing with negative space. You could do this along with tape resist art!

More activities you may like
How to dye rice using food coloring & rubbing alcohol
Easy finger knitting handicraft tutorial
My review of KiwiCo STEM boxes (the good & the bad)