
Finger knitting is the perfect 1st handicraft for kids! And you can master this in about 10 minutes and then teach your kids. All you’ll need is a ball of yarn, your fingers, and a pair of scissors. Your kids can finger knit just for fun, or turn it into a bracelet or necklace.
Be sure to watch my video below to see the easiest version of finger knitting using just 1 finger loop! You can also adapt this to finger knit chunkier pieces using 2, 3, or 4 fingers.
I like the 1 finger version for my almost 6 year old. It’s easier for her to hold onto than the 4 finger version, and the project goes much faster.

Supplies you’ll need for finger knitting with kids
- fingers
- scissors
- chunky yarn (But any thickness will do). The rainbow yarn or multicolored yarn works really well for beginners because it helps you to differentiate some of the loops you are pulling.

How to form a slip knot before you begin finger knitting
No matter how many fingers you choose to use, you’ll have to first create a slip knot. This makes the loop that ties to your pointer finger. I recommend watching the video if you’ve never done one!
To form a slip knot:
Start your slip knot about 4-6 inches from the cut end of your yarn. You’ll want to have that extra yarn on the end so you can tie it later.
Begin by making a loop, so that your yarn crosses itself. Below my pink/yellow sided string is the end that’s cut.


Then, you will make another small loop to go under and up through your 1st loop. This will be the part that can tighten and goes on your finger!

Once you bring the 2nd loop up through the 1st loop, hold the 2nd loop while you gently tighten the strings. Then, place the slip knot on your pointer finder. You are ready to begin finger knitting!

How to finger knit using a 1 finger loop
Tighten the slip knot around your finger. Try to hold the short piece of yarn out of the way by pinching it in your hand.
Otherwise it can tend to get in the way (just at first) and also makes it hard to pull the long side of yarn tight (the side that’s still attached to the ball of yarn).
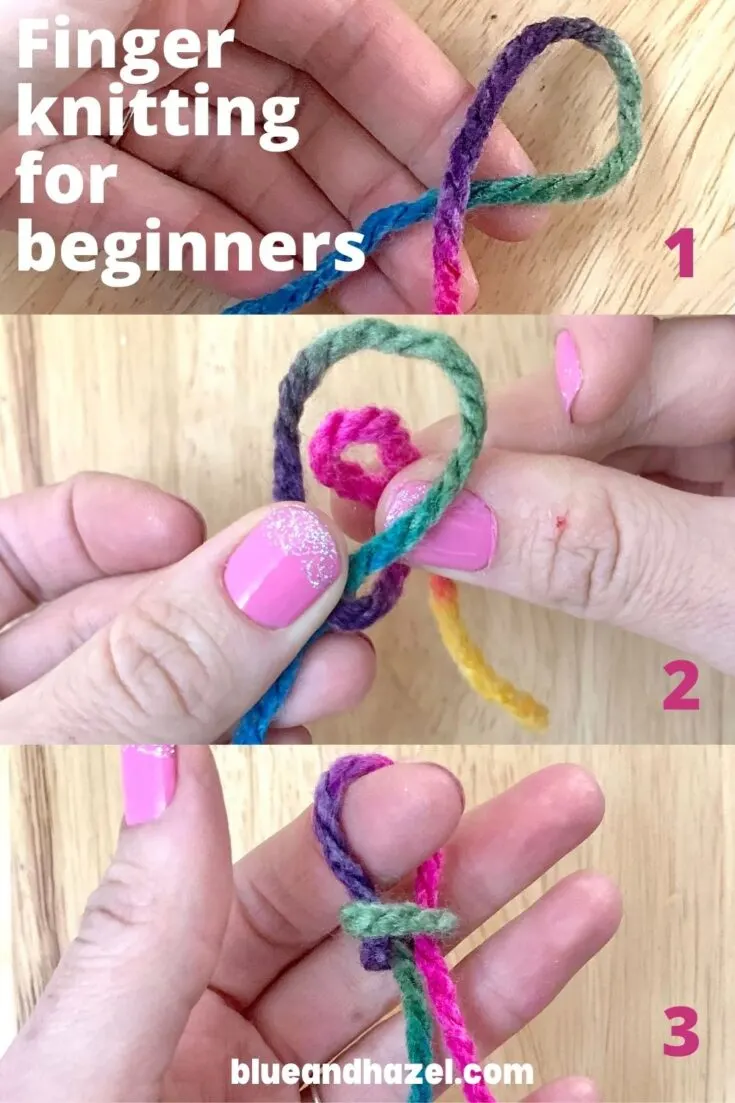
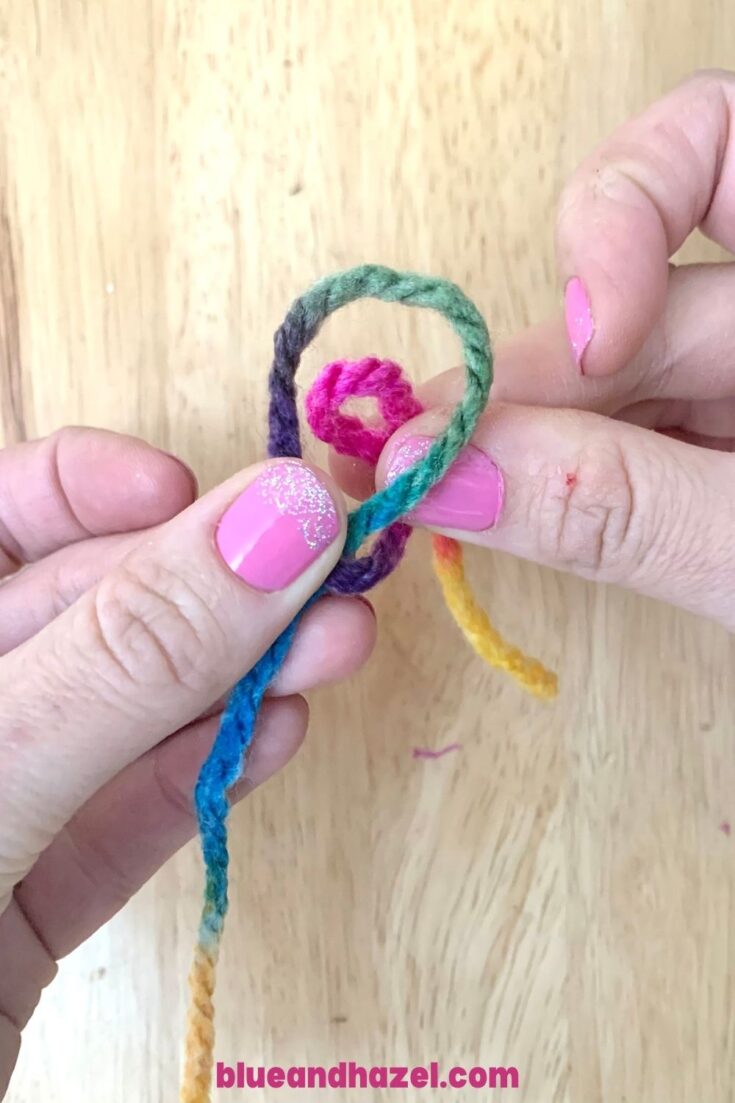
Next, unravel enough yarn so the ball isn’t in your way. Grab that piece that’s still connected to the ball. Loop it around your pointer finger by circling under and away from your finger. It should be closer to the tip of your finger than the loop that’s already there.
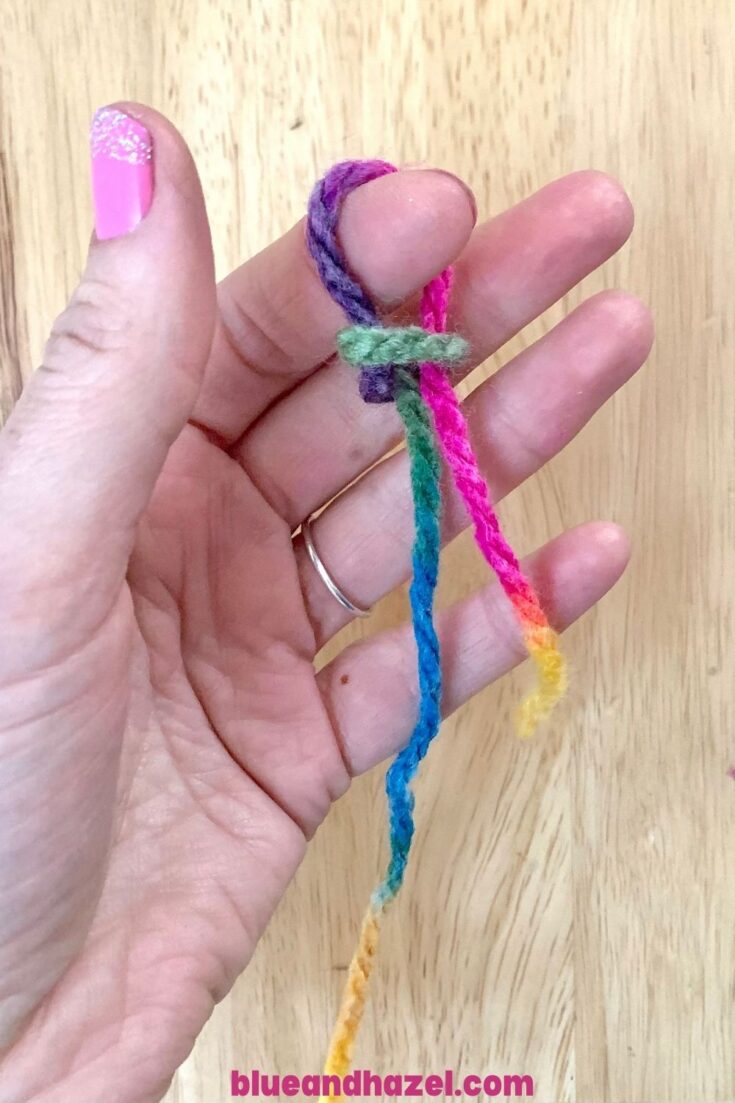
Next, take the yarn furthest from the tip of your finger and pull it over the other loop and off of your finger! I call this step “jump over the rope”.
Rinse and repeat.
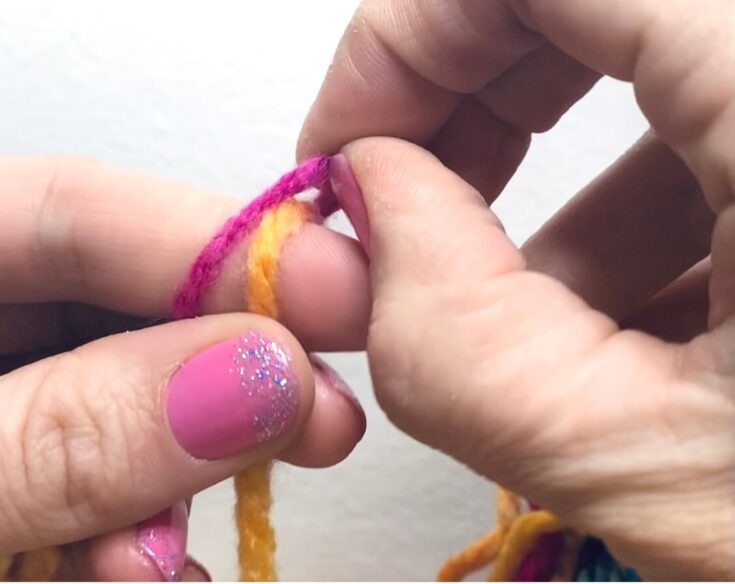

(In the pic, the yellow string was looped around, and the pink string jumped over the yellow string and off of my finger. Rainbow colored yarn makes this especially helpful for beginners!)
“Loop around, jump over the rope” This is how I taught my daughter to remember these steps.
See the video for a great visual! Repeat till your finger knitting is as long as you’d like!
How to tie it off at the end
Cut the string a few inches from the end so you have room to tie. Take your finger out. Tie it by bringing the cut yarn up through the loop and pulling it closed.
Turn it into something useful
Hope this gets your kids creative juices flowing and lets them practice hand coordination! Those two things alone make this worth it even if this ends up in the garbage.
I don’t think my kindergartener and 1st grader are ready to try crochet or knit (not to mention I’d have to teach myself first lol), but they can definitely finger knit!
You could make these into friendship bracelets, necklaces, or glue together in a circular pattern to make a Calico Critter rug or just a pretty flower type thing. Whatever suits your kids’ fancy!
Thanks for reading and be sure to pin so you can find this again!
Related Posts You May Enjoy:
Mega list of free nature curriculum for all 50 states
Why boredom is good for your kids and how to handle “Mom I’m bored”