
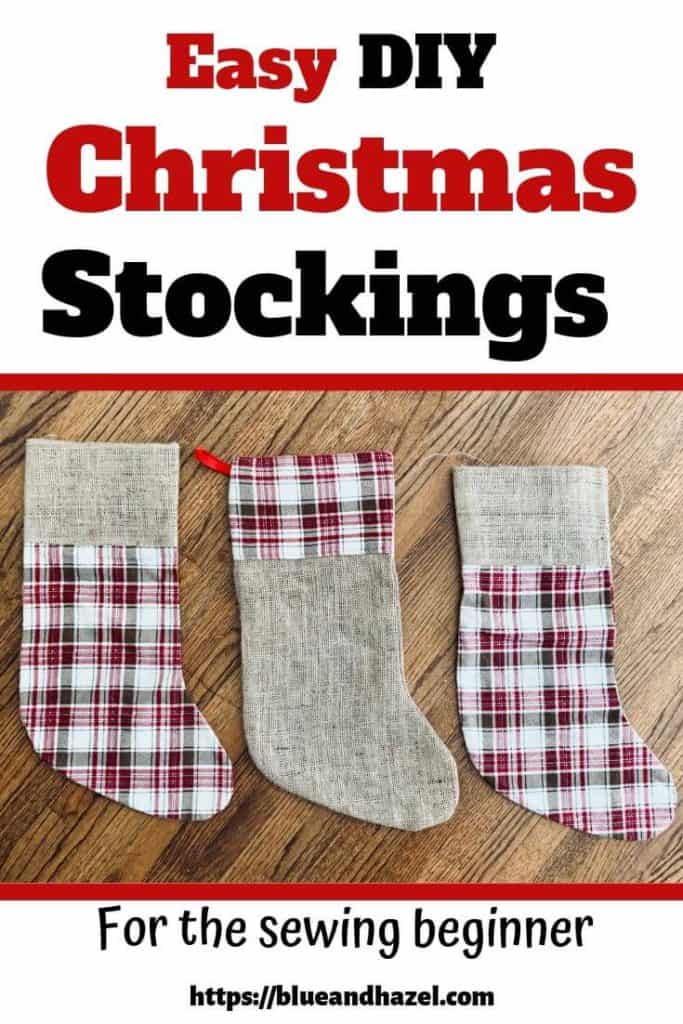
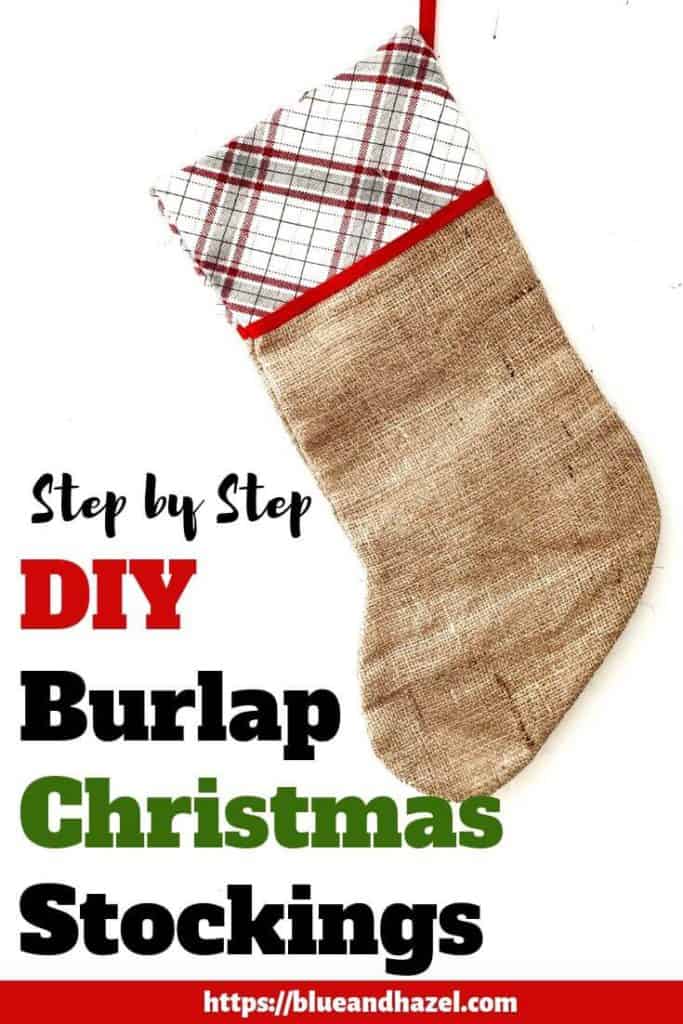
About 2 years ago, I wanted to buy burlap Christmas stockings. After seeing how much it was going to cost me to buy 5, I thought…this can’t be that hard…I’ll make my own. I’m not great with a sewing machine, and mending is about the extent of my talents there. So trust me when I say you can do this! Here’s a step by step tutorial for you to learn how to sew a burlap Christmas stocking!
Supplies needed to sew a burlap stocking
- Burlap (this roll is 40 inches wide X 5 yards long for cheap)
- Fabric to line the inside of the stocking or just enough for the upper rim.
- Ribbon for the hook and any decoration you want on the front of the stocking.
- Glue gun, optional if you opt to get any decoration.
- A large paper grocery bag as long as a stocking to make your pattern out of. You could also cut out cardboard.
- Pins
- Sewing Machine. Here is the one I bought as a beginner and it’s so basic, easy to figure out, has insanely good reviews, and super cheap.

Related Christmas posts you might like
- Easy DIY Advent Calendar using mini burlap bags
- Christmas on a budget: How to make it special with less
- Christmas gifts for 5 year old boys
- Gift guide for preschoolers
Things to consider before you start sewing Christmas stockings
- How big do you want it? We wanted large ones because we tend to put a lot of crafts and food items in stockings.
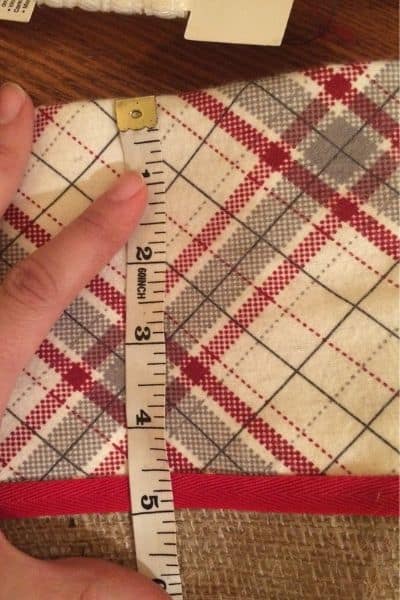
- You can always customize them by ordering iron on names. I wanted to do that so I made sure to have a nice wide 5 inches of fabric at the top.
- Do you want to line the inside or not?
- I found it easier to do step 1 X how ever many stockings I was doing. Then step 2 for all, etc. However, you may want to do just one all the way to make sure you like it.
- If money is not issue and you are short on time, there are some REALLY cute ones you can buy on Etsy. On average I saw 4 NICE burlap stockings for around $100.
- You may want to buy a lot of extra printed fabric in case you need to make more years down the road and can’t get a good match. Or in case grandma and grandpa come to visit for Christmas!
How to sew a burlap Christmas stocking step by step


Before you start, decide if you want to line your burlap stockings with fabric or not. This tutorial shows you how, and I think that the lining makes for a sturdier stocking, but is NOT necessary.
And it’s way faster (while still being sturdy) if you choose not to make a lining.
I made 3 (pictured above) without the lining and they were still gorgeous, less complicated, and took half the time. If you decide not to, I’ll show you which steps to skip.
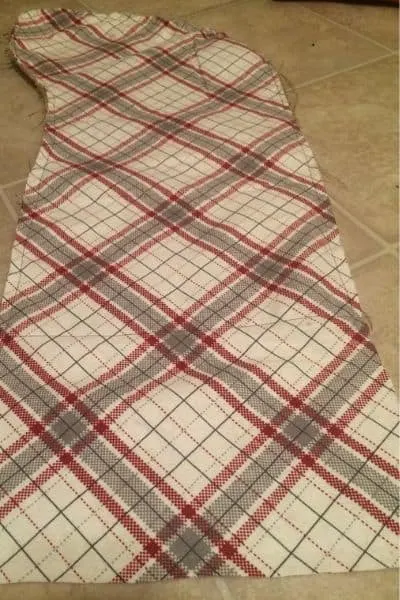
Step 1: Make a pattern by tracing an old stocking, then cut the pattern and pin to burlap.

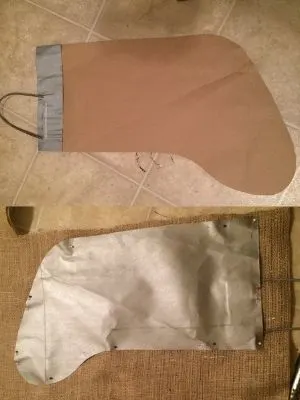
To make a pattern, you can either trace a stocking you already own that is the size and shape you want. Or, you can look up a photo of a pattern and try and free style draw something similar.
I chose to trace around a cheap stocking I already had. Be sure to make the pattern about a 1/4 inch extra all around since the sides get sewn together and it will look a tad smaller than the size you cut.
Step 2: Pin the pattern to the burlap and cut two pieces out.
Pin the pattern to your burlap fabric. Since each stocking needs two sides, you can fold the burlap roll in half and then pin, so you get two pieces for one cut. Then cut.
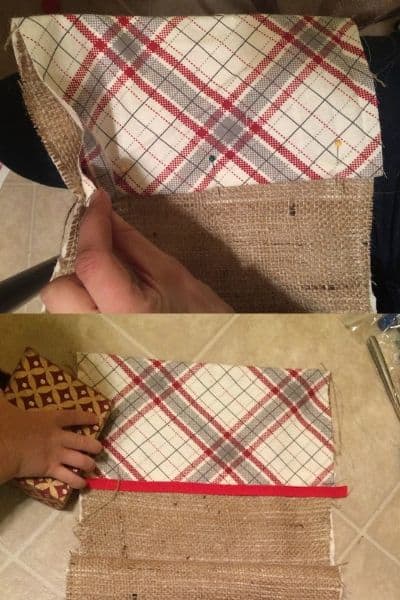
If you are sewing a full lining: If the plaid you have is one sided like mine, fold your printed fabric in half, print facing in. Then pin the pattern to it and cut both layers at once. Except, make the top longer than the burlap by about 5 inches, so it can fold over the top of the stocking and give that nice decoration. See pic below for example.
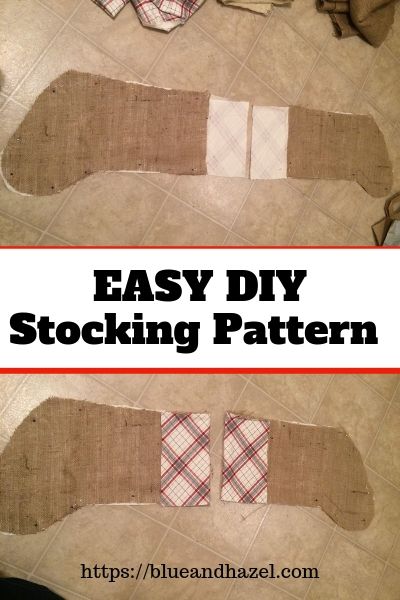

Now you should have two burlap cutouts, and 2 fabric cutouts. Pin them together as pictured above.
If you don’t want a full lining: This is much easier. I simply cut 2 plaid rectangles of the same size for the rim. This should be as wide as your stocking pattern is (mine was about 8 inches wide) and 10 inches long. It folds over the top of your stocking to give show about 5 inches on each side of the burlap.

Step 3: Sew burlap to lining around the edge
Since my edges didn’t all line up perfectly for all 4 pieces, (some ragged edges) I decided to sew each burlap piece onto it’s lining before sewing the whole stocking together. See below.
If you are not doing a full lining: Skip this step altogether, and go to the next step.

Step 4: Fold lining over the top, pin edge under, and sew all edges.

If you are sewing a full lining: For the simplest design, just tuck the end under as shown above, pin, and sew a straight line. Remove pins as you go. I sewed the sides that folded down too, although technically you could technically skip that. They should get sewn together when the 2 boot pieces get sewn last.
If you are not sewing the full lining: Simply fold the 10 inch plaid rectangle in half over the top of the burlap. Tuck the ends under the side of the stocking that you want to look nice, and pin. Then sew a line across, removing pins as you go!
Repeat for the other piece of burlap.
If you want any ribbon like I did, add it after sewing the lined fabric under. You can hot glue the ribbon or sew it on.
Step 5: Add ribbon for hook, and sew stockings inside out.
This step will be the same if you are doing a full lining or just lining the top.

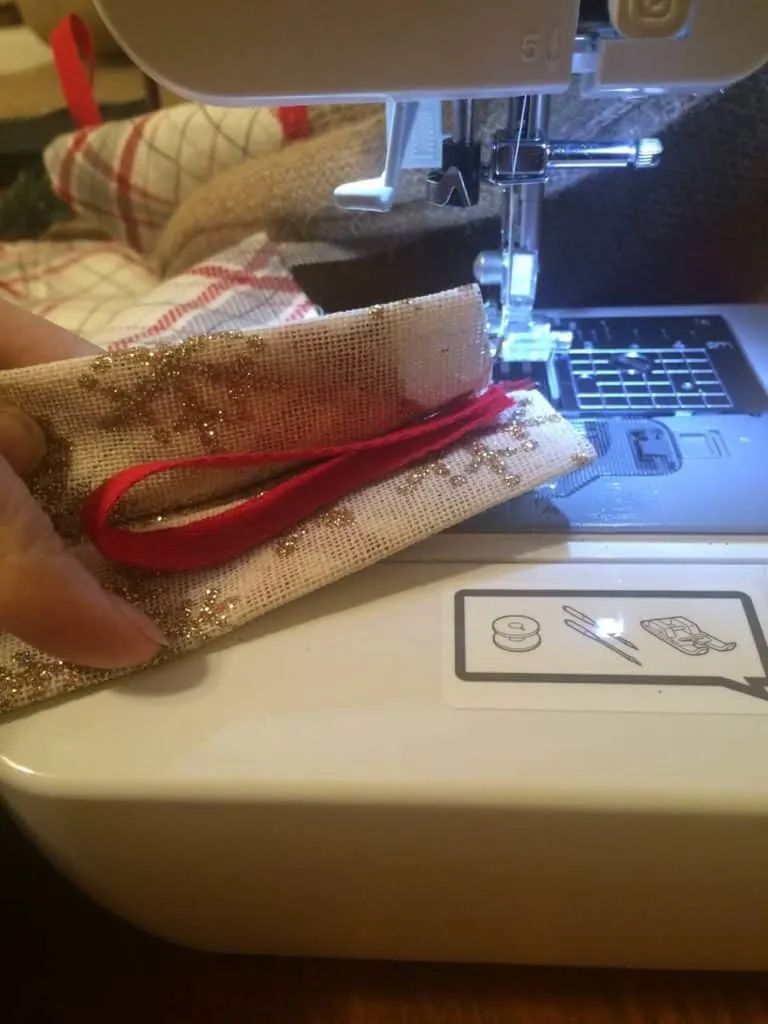
One thing I forgot to do first time was to cut a 2-3 inch piece of ribbon and sew it into the stocking to hang it. So have your ribbons cut!
Place burlap sides on each other, facing inside out. Tuck in the piece of ribbon, and pin all the way around. Sew it up, removing pins as you go!
Tip: Go back and forth over the ribbon that will hold the weight of the filled stocking. You want that baby to be strong!
Turn inside out, and admire! You just learned how to sew a burlap Christmas stocking to be cherished for years. These would make an awesome gift for a family too.
How to personalize your Christmas stockings

If you want to add a name to each stocking but don’t have a machine to do it, I highly recommend buying one off of Etsy! I bought these iron on names from a friend. You can find her Etsy shop here. Although they are not listed in her shop now, you can send her a message to see what she can make and say Blue and Hazel sent you. Or, just search iron on names in the Etsy search bar.
Once you make your burlap stockings, be sure to tag @blue.and.hazel on Instagram because I LOVE seeing what you make!

Judy
Friday 15th of October 2021
About how many do you get out of 5 yards? I am needing 8.
Liz
Saturday 16th of October 2021
That's a good question. I am not completely sure but I think that's enough for 8. The burlap I linked at the top of the post says 5 yards by 40 inches. If you folded the burlap in half before you pin your pattern on, you'd have the front and back accounted for with 20 inches wide to work with. And then 5 yards (180 inches) long for the 8 stockings. Divide 180 inches by 8 stockings and you 22.5 inches of fabric available per stocking. So you'll want your pattern shorter for some wiggle room, but it should work. Please come back here and let us know what works best for that many! Also I'd LOVE to see your finished stockings by tagging me on Instagram @blue.and.hazel. Have fun!
Melinda
Wednesday 7th of August 2019
This is adorable! I'm like you and not great at sewing, but this doesn't seem too hard! My mom used to make stockings for everyone in the family but she hasn't done it lately. The family has grown a bit, so maybe I'll take over for her with this tutorial :)
Liz
Wednesday 7th of August 2019
Thank you Melinda! You should try it! These would make an awesome family gift for sure if you have the time.